Share Article
Managed SSL integration with Azure Key Vault
A TRUSTZONE Managed SSL (MSSL) account can be integrated with Azure Key Vault, enabling you to issue certificates directly into Azure.
A TRUSTZONE Managed SSL (MSSL) account can be integrated with Azure Key Vault, enabling you to issue certificates directly into Azure. The integration also supports the auto-renewal feature of Azure Key Vault ensuring that your certificates will not expire and cause service outages.
NB: You can only issue OV certificates from pre-validated domains from an MSSL account. Currently there is no support for DV certificates.
Prerequisites
- A TRUSTZONE Managed SSL account
You can use the instructions on this page to setup the TRUSTZONE MSSL integration in in Azure.
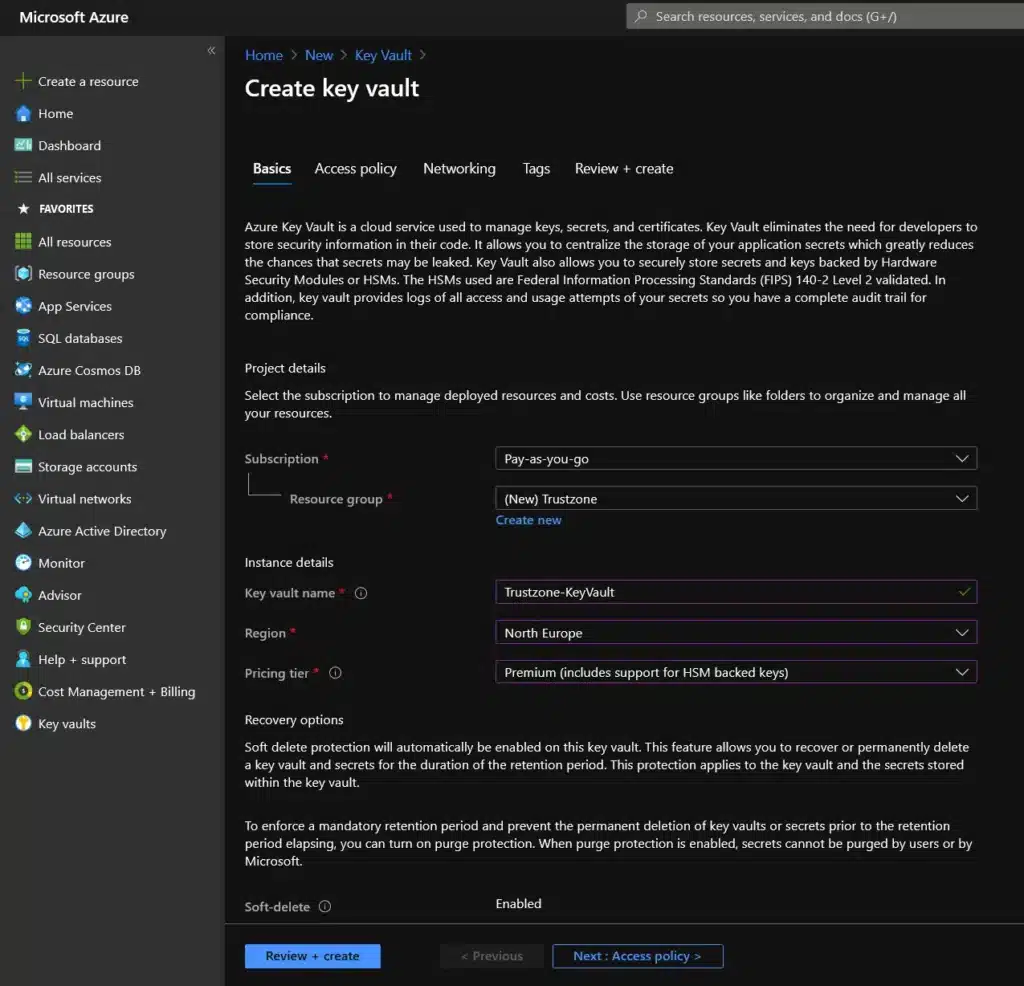
- If you do not have an Azure Key Vault already, please log in to your Azure Portal and click on the “Create a resource” button. Search for “Key Vault” and press “Create”.
Configure the Key Vault so it fits your requirements and location. Note that you only need the “Standard” tier to use our MSSL certificates, but if you need an EV Codesign certificate in the vault it needs to be a “Premium” tier.
- When your vault has been created, please select “Certificates” in the left side action bar and click “Certificate Authorities”.
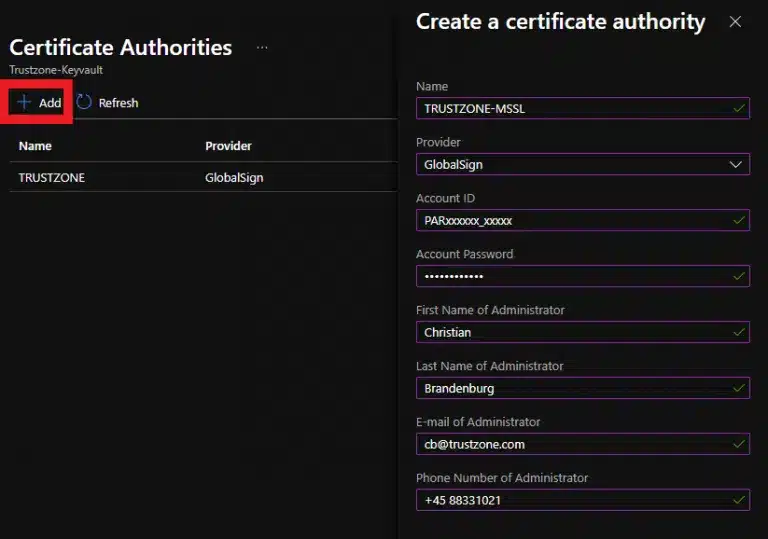
- Select “+ Add”. Then select “GlobalSign” as the provider and fill out your MSSL account details.
Note that the information provided should be the exact same as your MSSL profile.
Save when all the details have been filled out.
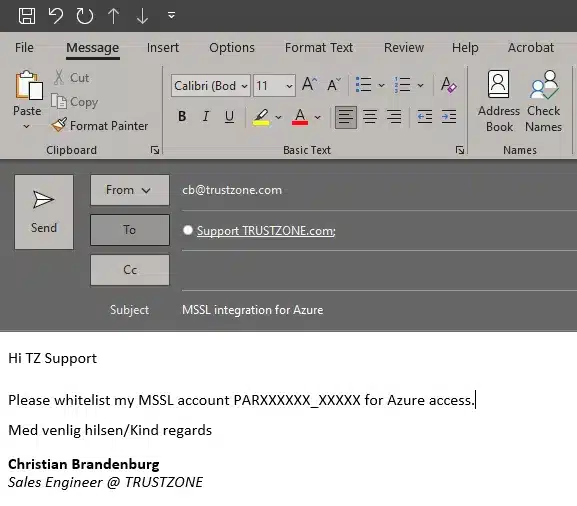
- Contact support@trustzone.com and provide your PAR number. To issue certificates we will need to whitelist your MSSL accounts.
- You will receive a notification from our Support Team when the account has been whitelisted.
Your Azure key Vault is now ready to issue TRUSTZONE certificates
Ordering a TRUSTZONE certificate with Azure Key Vault
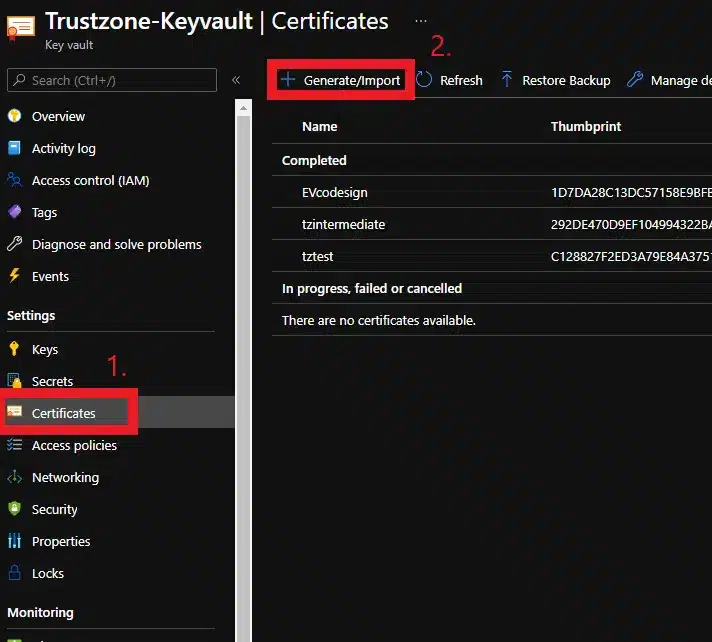
- To order a certificate, please go to your Key Vault and select “Certificates” in the left action bar under Settings. Then select “+ Generate/Import”.
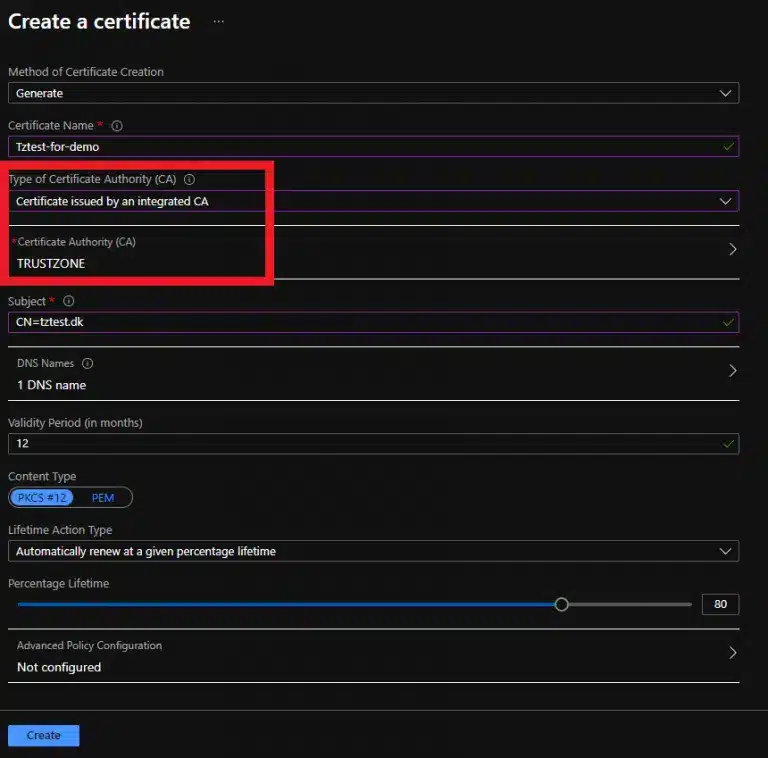
- Fill out “Certificate Name” with a memorable name (This is just for easy reference and will not go into the certificate)
Ensure that “Type of Certificate Authority (CA) is set to “Certificate issued by an Integrated CA” and that “Certificate Authority” is set to the name of the integration:

Fill out “Subject” with the Common Name for the certificate you want to order. You can also add SANs to the certificate under “DNS names”.
You can set up the auto-renewal with “Lifetime Action Type”. The maximum number of days you can renew the certificate before is 30 days, so you should not set this value higher.
If you set the percentage lifetime, ensure that you do not try to renew more than 30 days before expiration.
Then click “Create” to send the certificate for issuance.
- Your certificate will then show up in the Key Vault as “In progress” and after 2-3 minutes as “Completed”
The certificate is now ready for use within Azure.

Jon Tittmann
Vetting/Support Team Lead & OpEx
Jon has been an integral part of TRUSTZONE for the past six years, during which he has acquired substantial expertise in the cyber security field. As the team leader for our support team, he possesses a profound understanding of the sector, enabling him to resolve even the most complex challenges within the certificate industry effectively.
