Share Article
Setting up Simple-ACME with TRUSTZONE ACME Pro (HTTP Validation – Non-wildcard)
Step-by-step guide to setting up TRUSTZONE ACME Pro with IIS using a non-wildcard certificate and HTTP validation
Configure certificate
1. Start wacs.exe with administrator privileges.

Tip: Simple-acme requires administrator privileges to set up the scheduled task to automatically renew the certificate. If simple-acme is started without administrator access the certificate can be ordered, but automatic renewal will not be configured properly
2. Simple-acme has a “default settings” option which can be selected if the your use-case is IIS bindings with HTTP validation. For this guide we will select the “full options” for a more in-depth walkthrough of the options available.
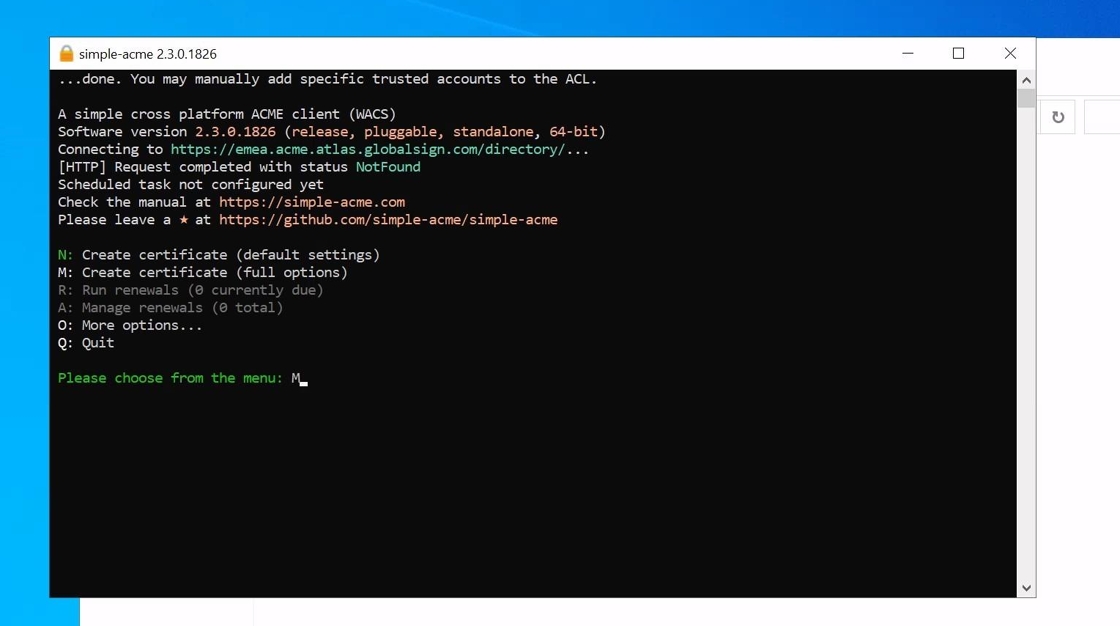
3. As we will configure our certificate for IIS we will select option 1 to get a list of available bindings in IIS and ensure that the correct FQDNs are covered.
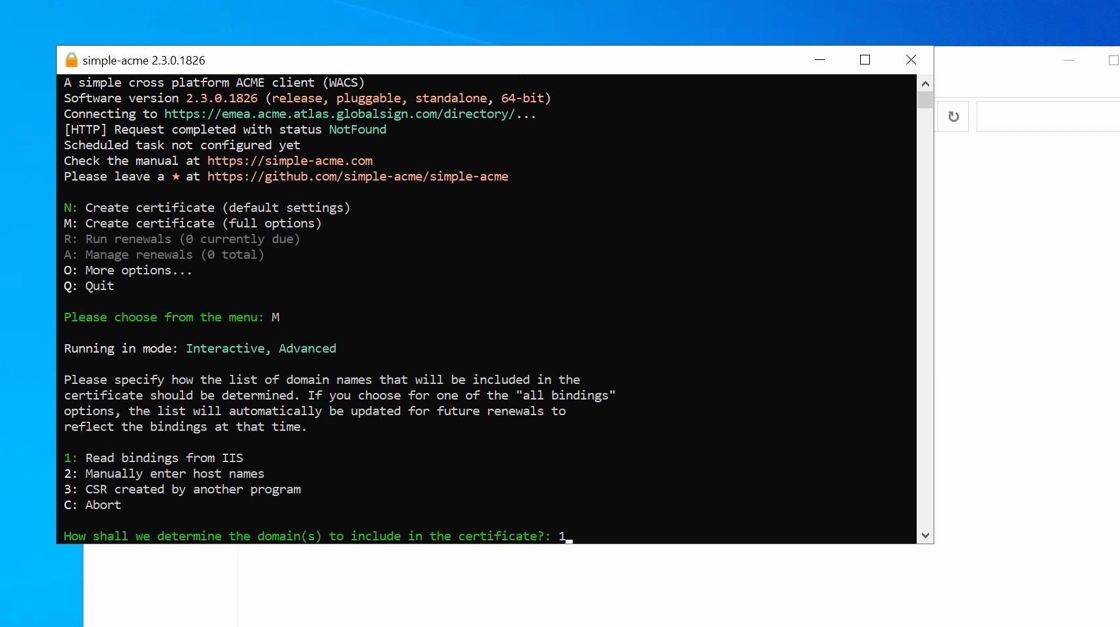
4. The client will then display a list of sites available in IIS. In this example IIS only has a single site with two bindings. If your certificate needs to cover multiple sites leave this option empty.
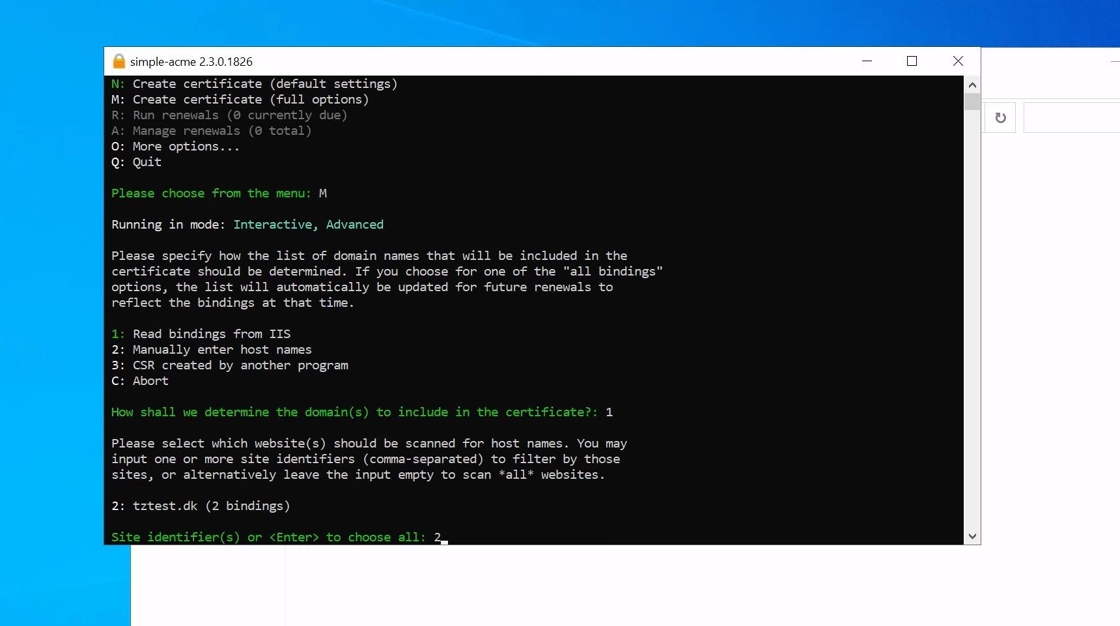
5. Afterwards the client will prompt to select the bindings the certificate needs to cover. These can be input manually ie. tztest.dk, www.tztest.dk or as in our example the “A” option ensure that all bindings for the specific site is chosen.
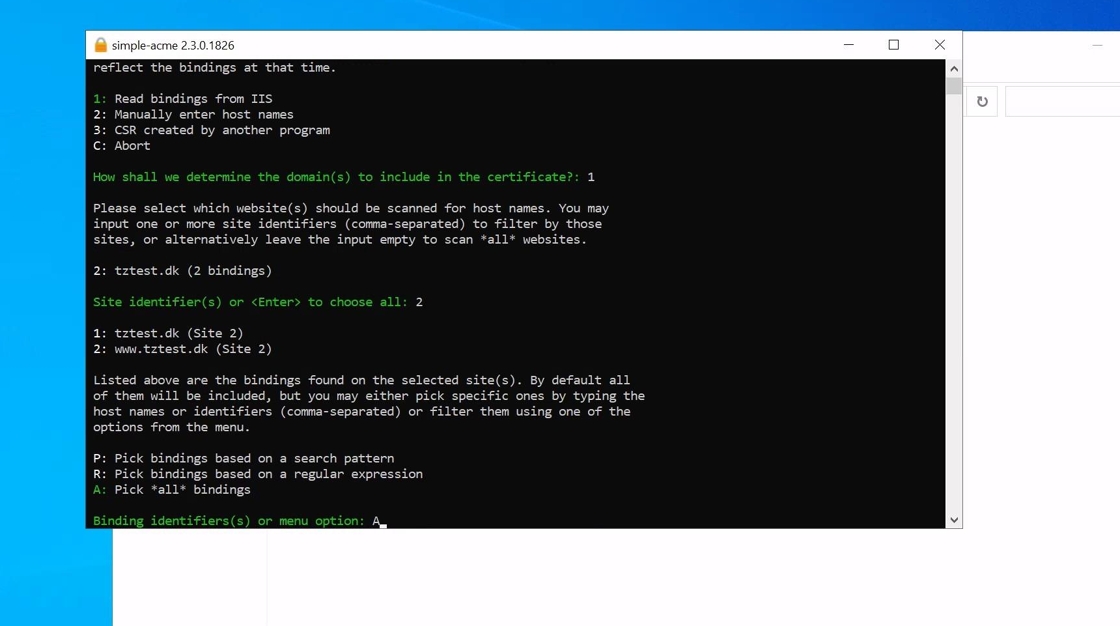
Alert: Each FQDN takes up an ACME Pro unit meaning that in this example 2 units are used (tztest.dk and www.tztest.dk)
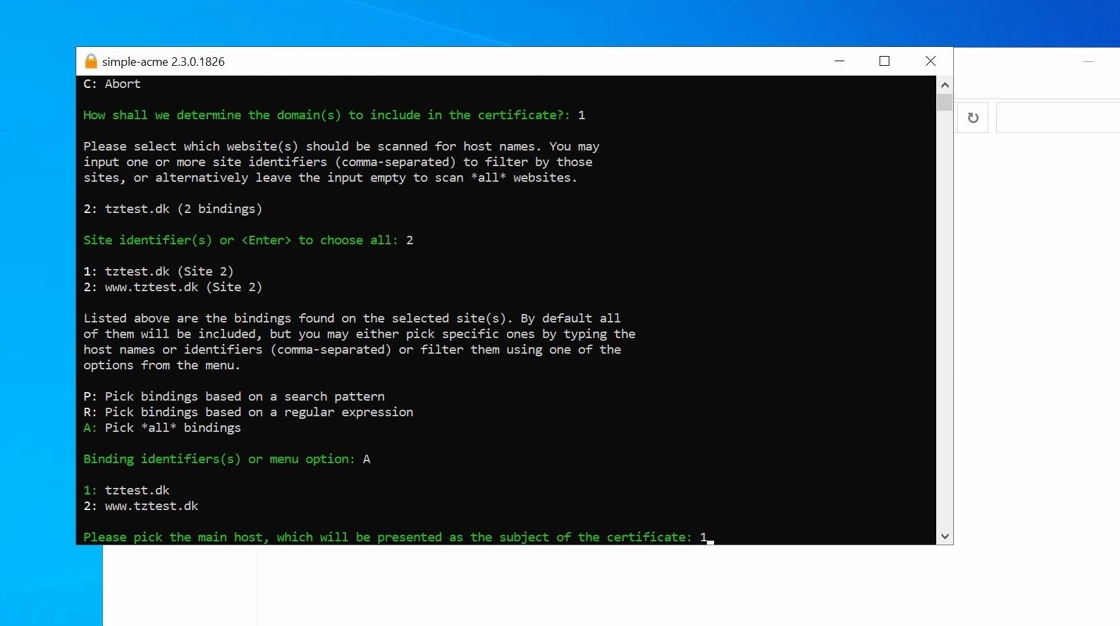
6. The client will then prompt for the Common Name of the certificate.
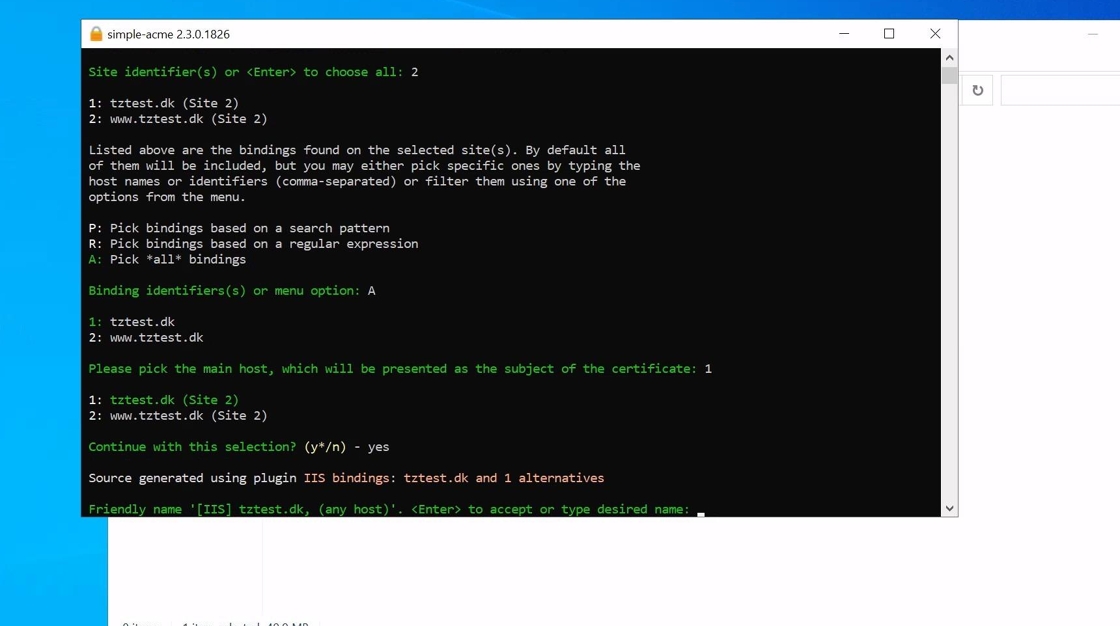
7. Then the client will prompt for a Friendly name. This name only used for easy identification of the certificate and has no bearing on the certificate itself. So you are free to input whatever helps you identify the certificate better.
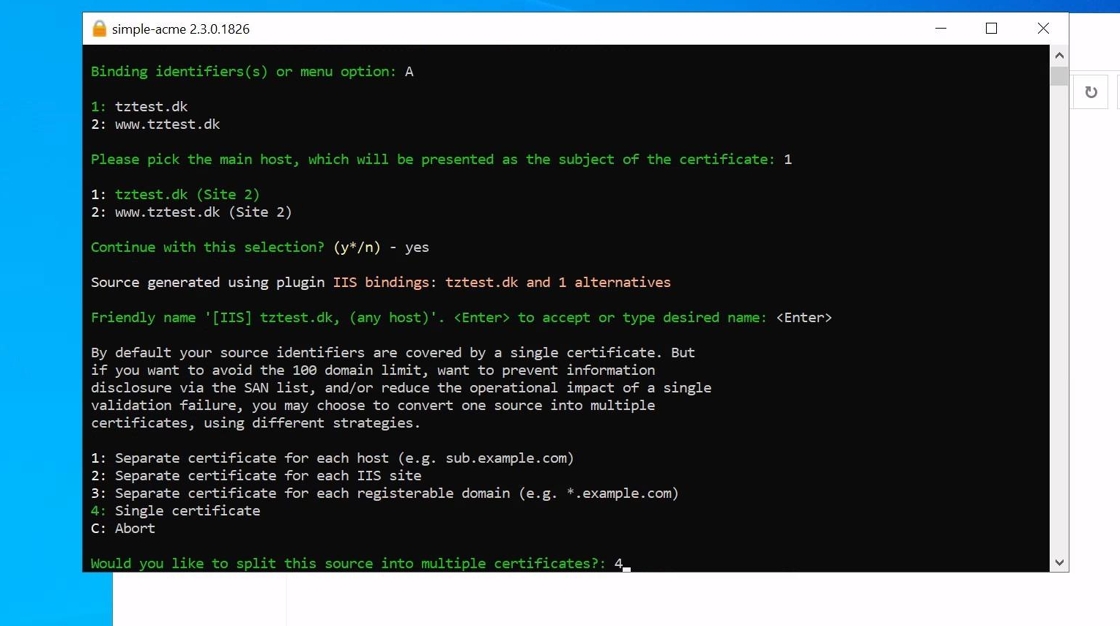
8. You can then select if you want a certificate per FQDN or as a single certificate. Unless you use-case specifically requires multiple certificates we usually recommend using the “Single certificate” option.
9. You will then be prompted for the validation method. In this example HTTP validation is used. Please note that this validation method requires port 80 inbound to be open as the simple-acme puts a validation code on /.well-known of the HTTP site.
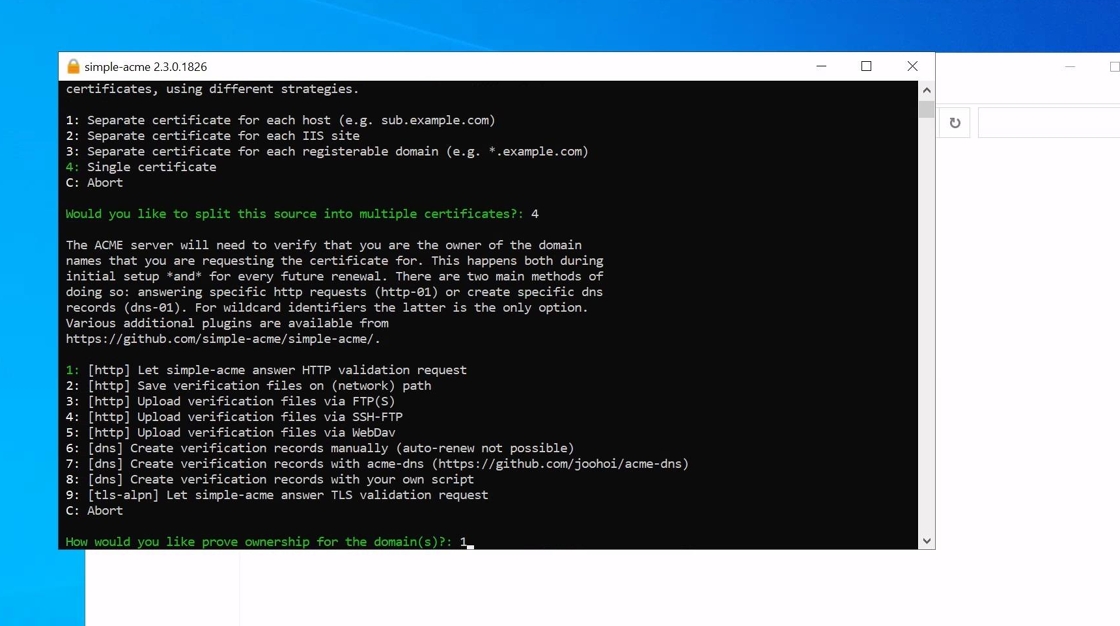
10. Select option 2 ie. RSA for the key pair. This is the default used by TRUSTZONE ACME Pro. IF you would like to use ECC instead please contact us to configure your profile for ECC instead.
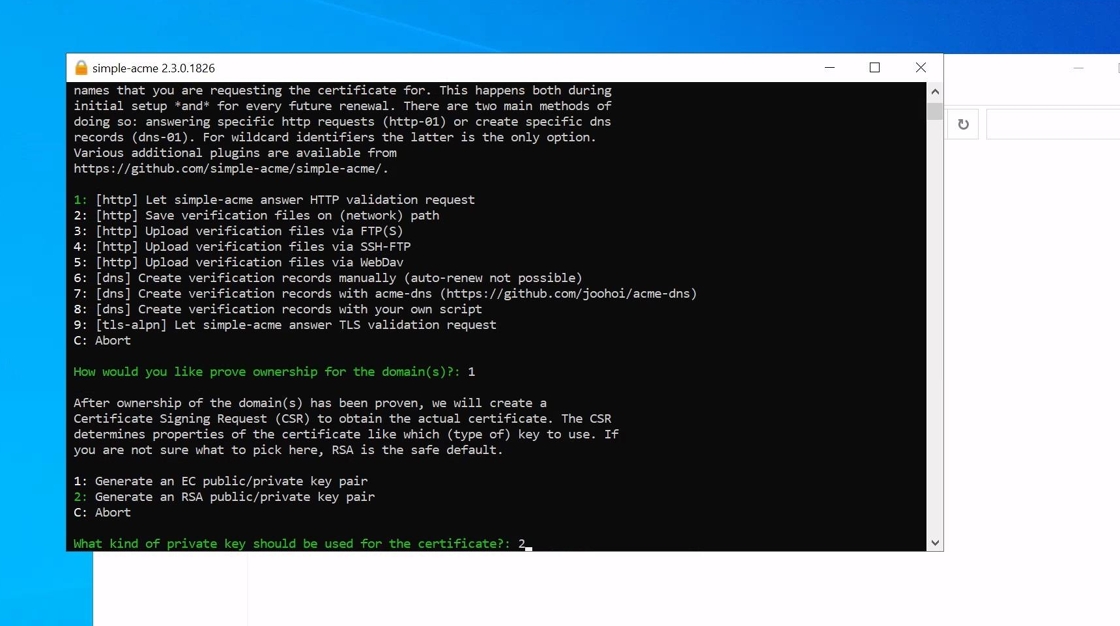
11. As our certificate is for IIS we will select option 2 to add the certificate to the Local Computer certificate store
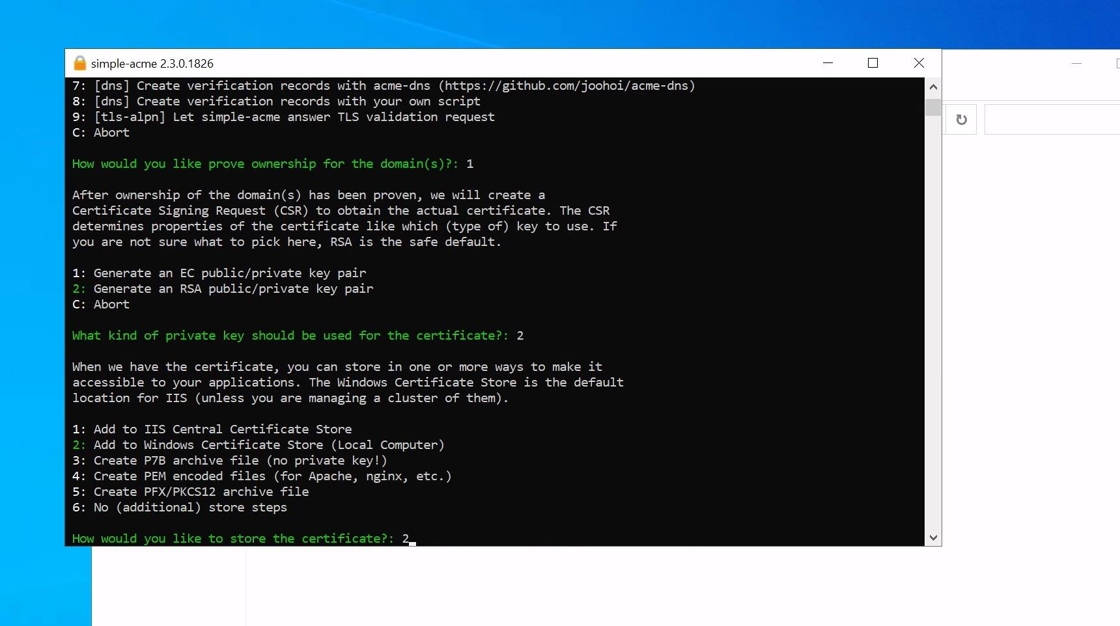
12. For IIS the default should be selected ie. Webhosting
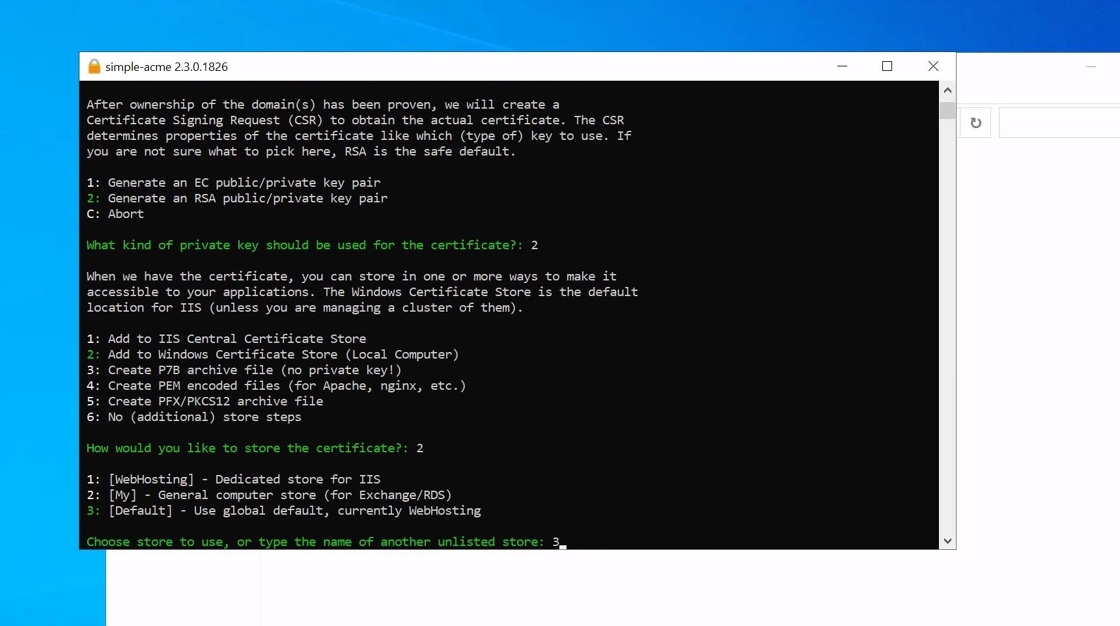
13. If you wish to have your certificate in an additional format this can now be selected. You can choose multiple formats can be selected if needed (ie. you can have your certificate exported as both PFX and PEM at the same time if needed).
Note that you will not be able to export the certificate from the Certificate Store afterwards as simple-acme saves it with the private key set to non-exportable.
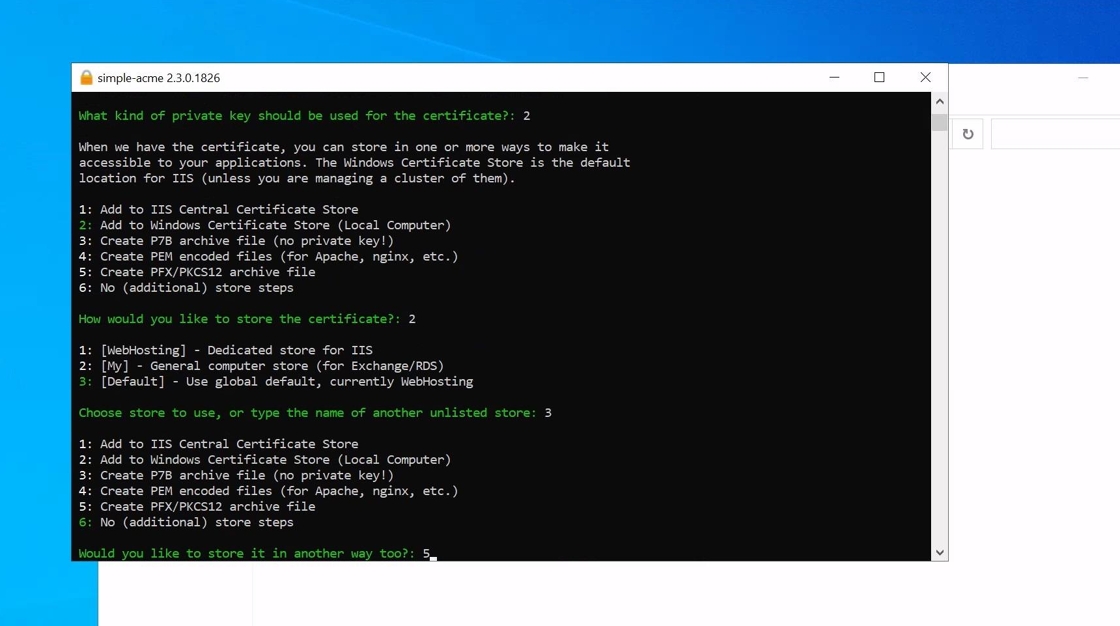
14. If you do not need the certificate as a PFX please skip the “Export as PFX” section by clicking the link below:
Export as PFX
15. Chose a folder where you would like the PFX file to be stored in.
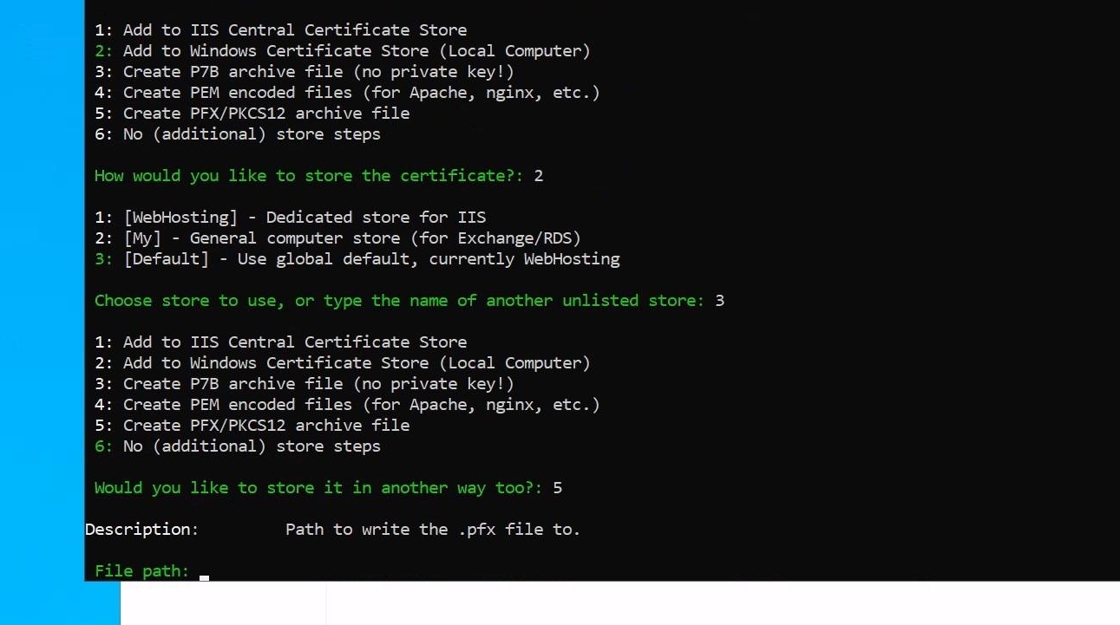
Tip: When the certificate is up for renewal the agent will automatically put the certificate in the same folder
16. You will then have the option to set a password for the PFX file. It is always recommended to set a password unless you have a specific use case requiring the password not to be set (fx. older systems that do not support AES256 encryption).
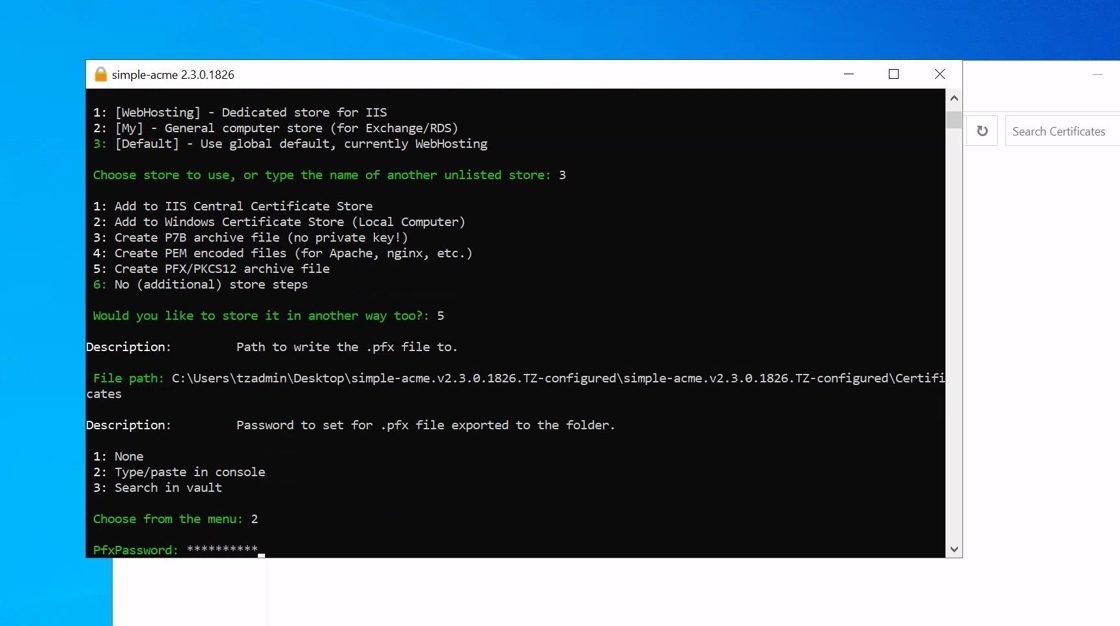
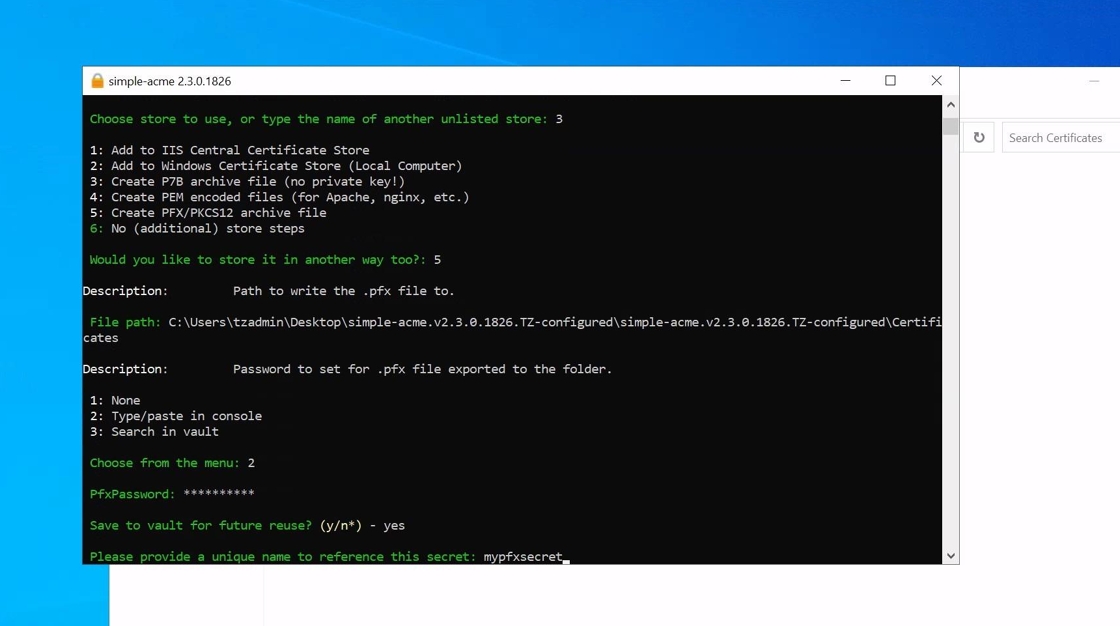
17. Simple-acme includes a encrypted password vault, which can be used to save passwords. If a password is saved in the vault it can be reused for other orders, but please ensure that you have the password stored securely somewhere else as you will not be easily retrieve it in the agent.
Configure certificate continued
18. Select Option 6 when all the relevant export formats have been selected.
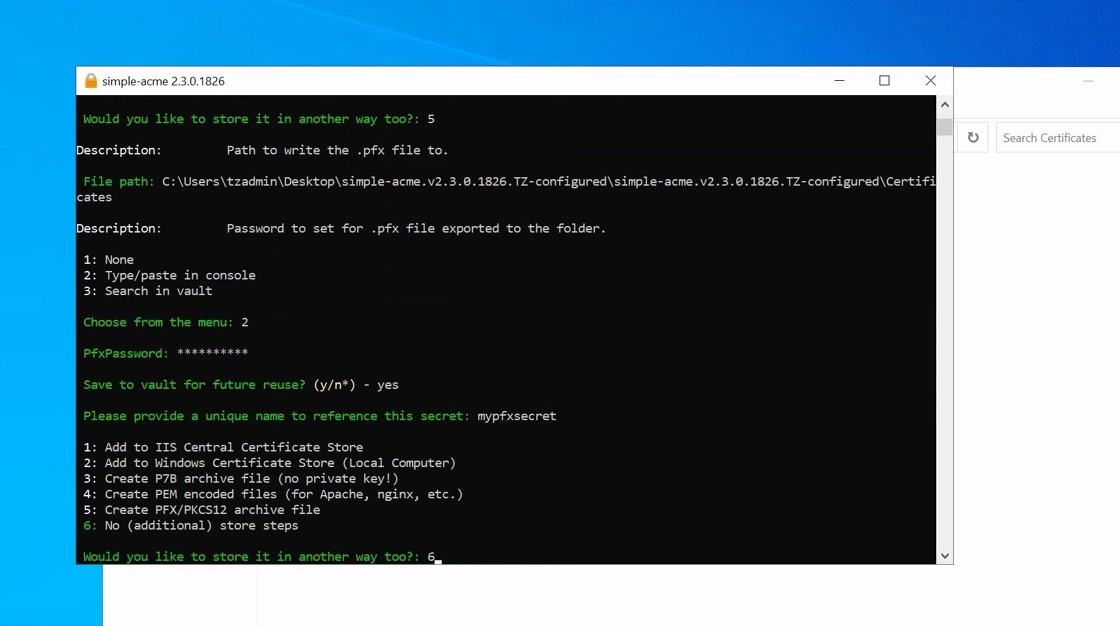
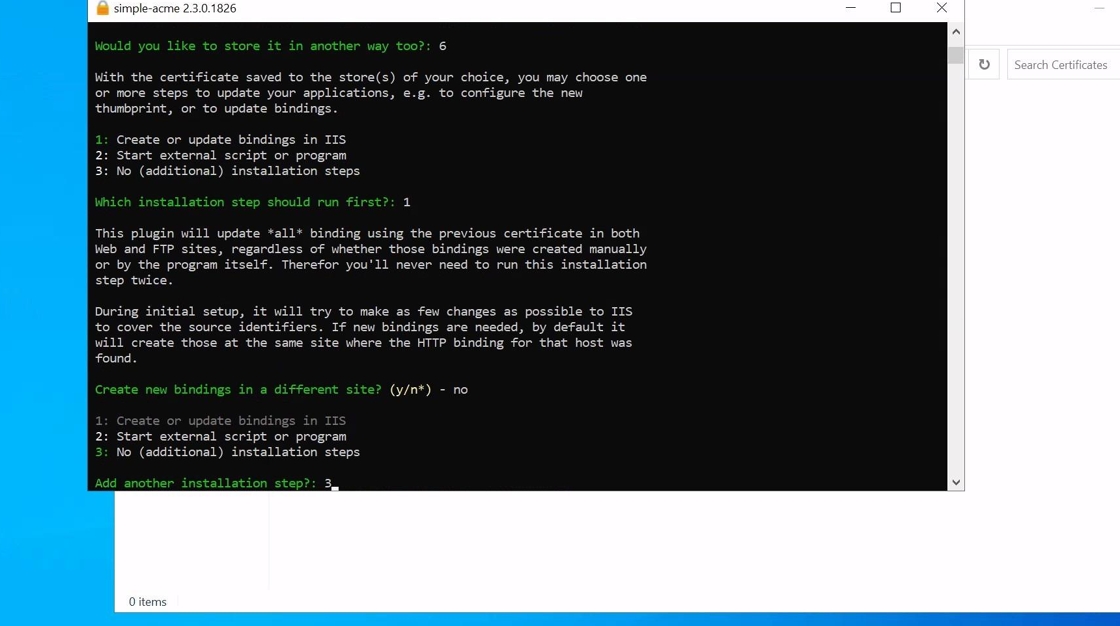
19. Select Option 1 to configure the Simple-acme to automatically bind your certificate in IIS

20. If additional scripts needs to be run (fx. if the certificate need to be configured for another service such as RDS) this can be set with Option 2. If nothing else is needed select Option 3
Configure credentials
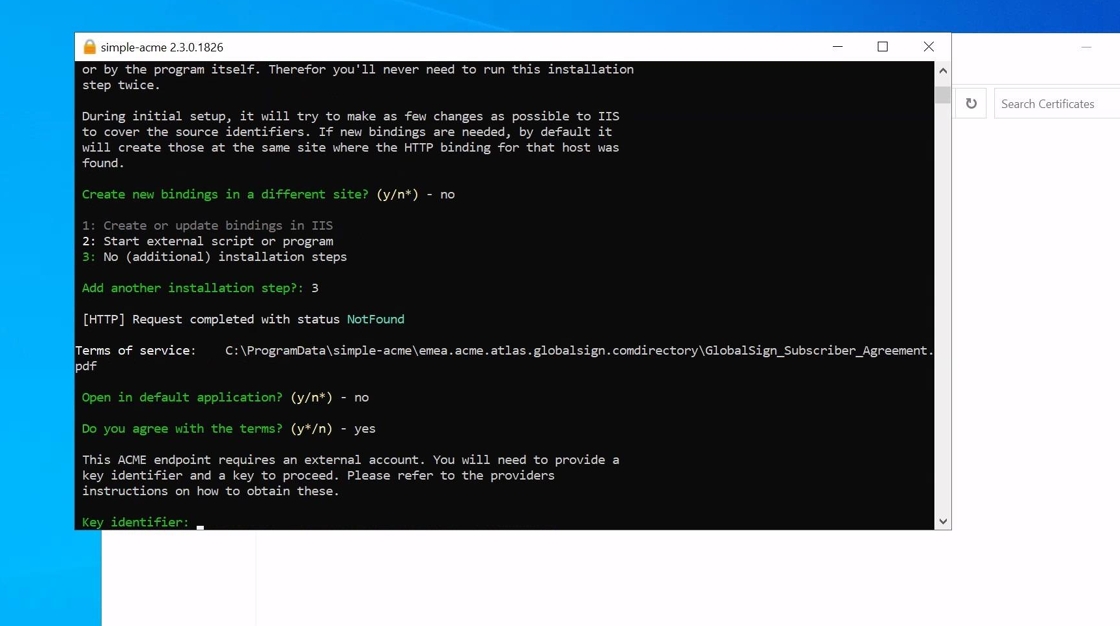
21. You will then be asked to accept the Subscriber agreement. When the Subscriber agreement has been accepted you will need to input credentials from your TRUSTZONE ACME PRO account.
Please go to tcp.trustzone.com to find your credentials
22. After logging in to your TRUSTZONE account select the “ACME PRO” tab and copy the KEY ID to your server.
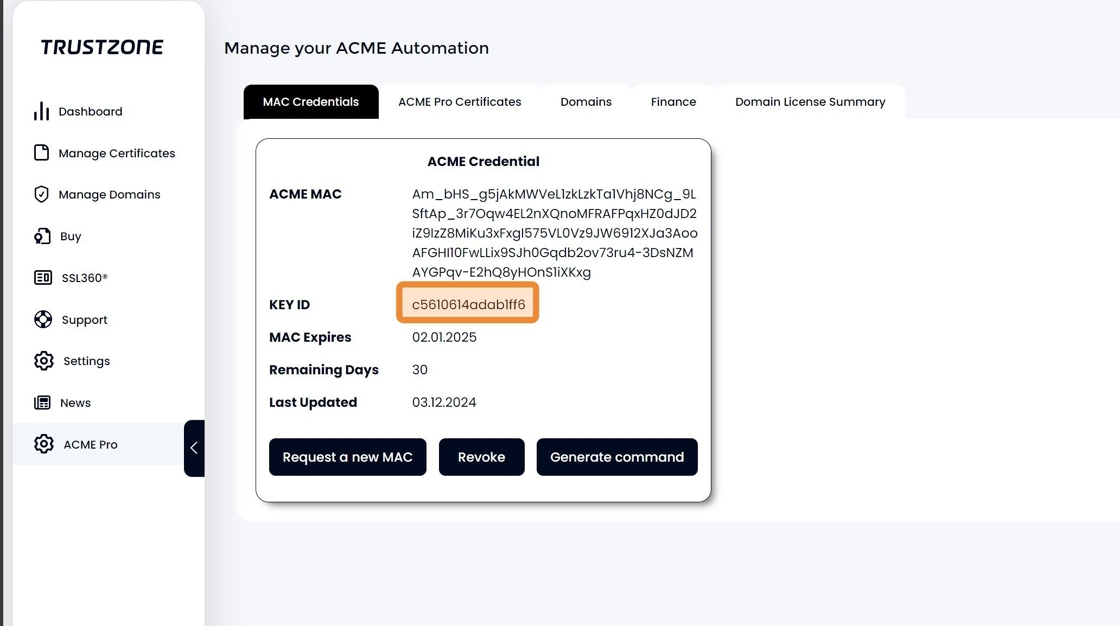
23. You also need to copy your ACME MAC to your server as well
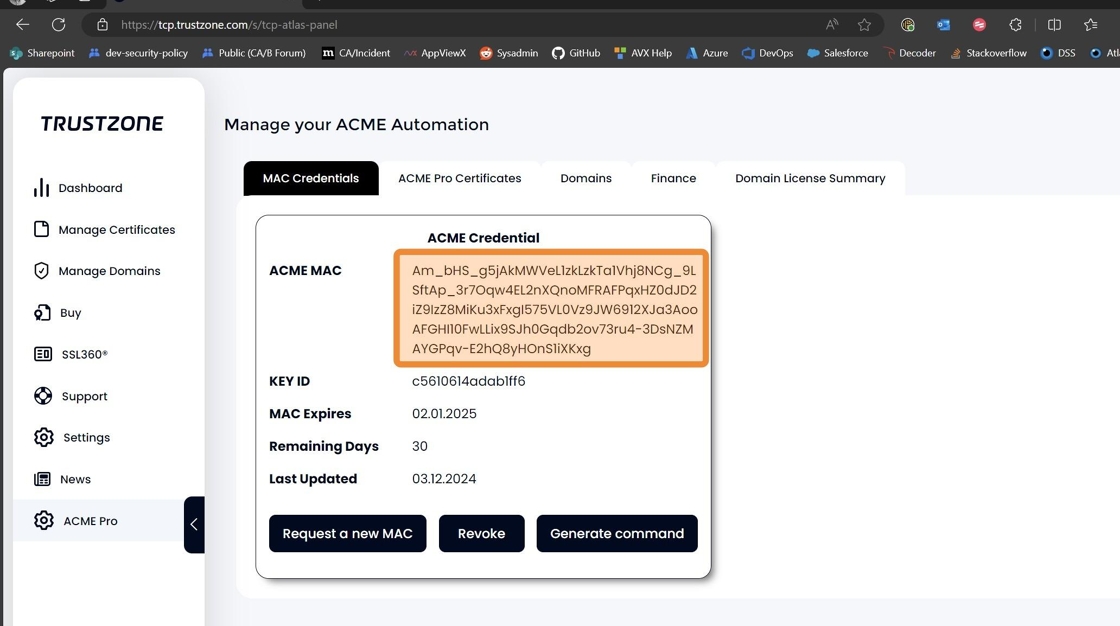
Alert: Ensure that your credentials are still valid by looking at “Remaining Days”. If the Simple-acme client receives expired or incorrect credentials it will close without issuing the certificate
If your credentials are not valid please click the “Request a new MAC” to receive new credentials
24. The KEY ID corresponds to “Key Identifier” and the ACME MAC to your “Key (base64 encoded) in Simple-acme
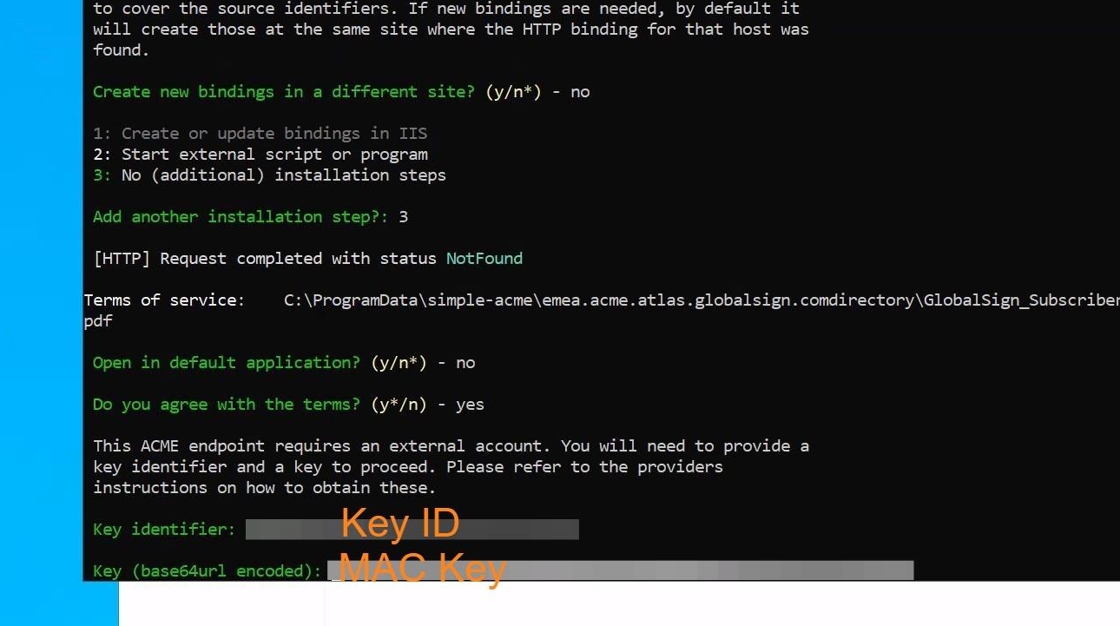
25. After inputting your credentials you will now be able to get your certificate issued and you should see the client issue the certificate as the picture below.
After the issuance you will be asked if you want to specify the user the Scheduled Task uses to renew the certificate. If you do not have a specific service account you want to use for this purpose type “n”.
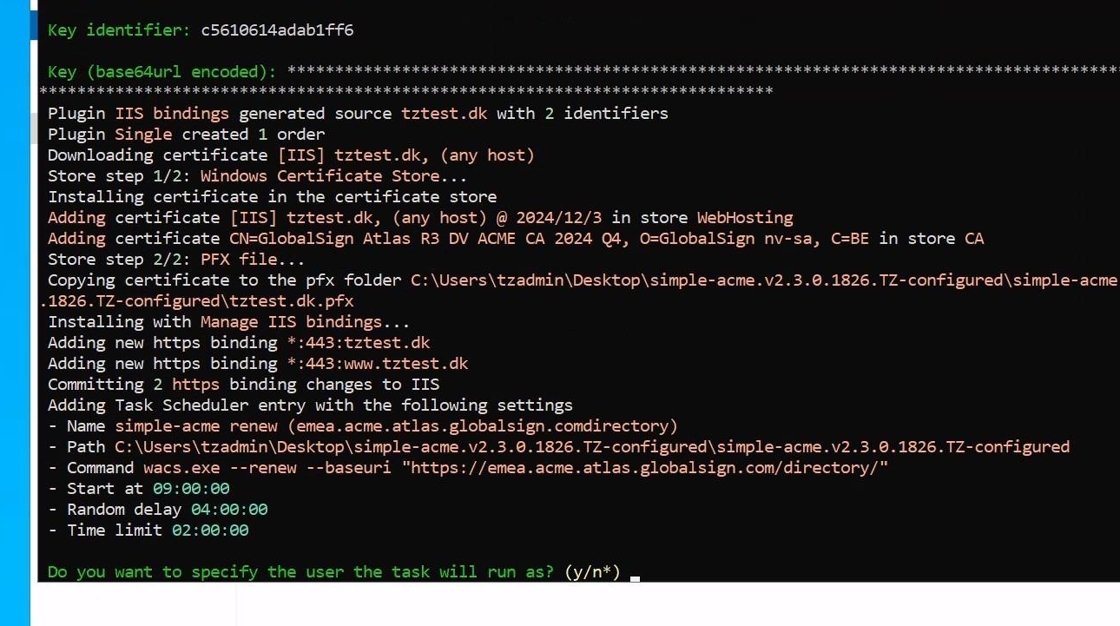
26. Your certificate should now be issued and configured in IIS. Please doublecheck that your IIS has the new certificate and that is has been configured correctly. The next time the certificate needs to be renewed the Scheduled Task should handle everything automatically without user interaction.
Submit Your Technical Queries Here for Expert Assistance!
We will contact you as soon as possible.
Please enter your details below.

