Share Article
How to Generate a .pfx File on a Microsoft IIS 10 Web Server
Follow the instructions in this guide to create your .pfx file on Windows Server 2016 using IIS 10.

Follow the instructions in this guide to create your .pfx file on Windows Server 2016 using IIS 10.
Using IIS 10 to create your .pfx file
1. In the Windows start menu, type Internet Information Services (IIS) Manager and open it.
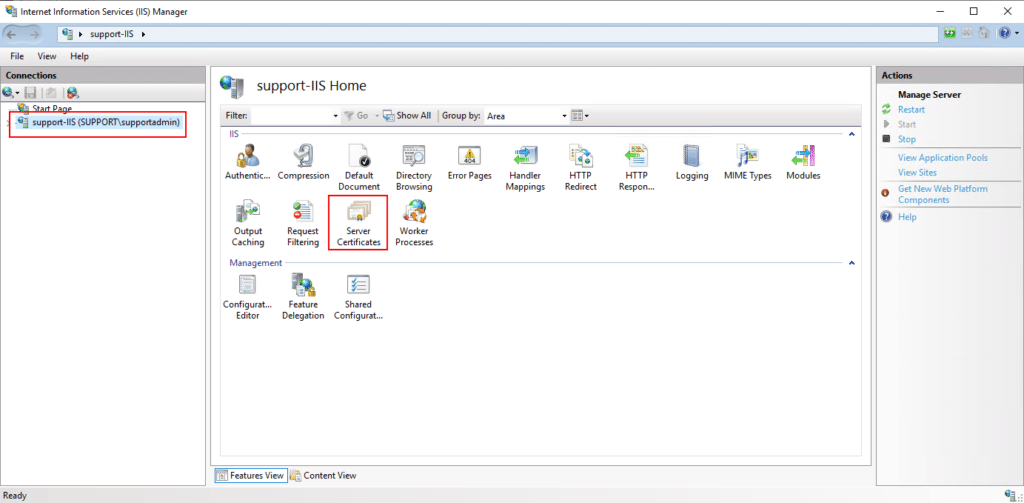
2. In Internet Information Services (IIS) Manager, in the Connections menu tree (left pane), locate and click the server name:

3. On the server name Home page (center pane), double-click Server Certificate in the IIS section.
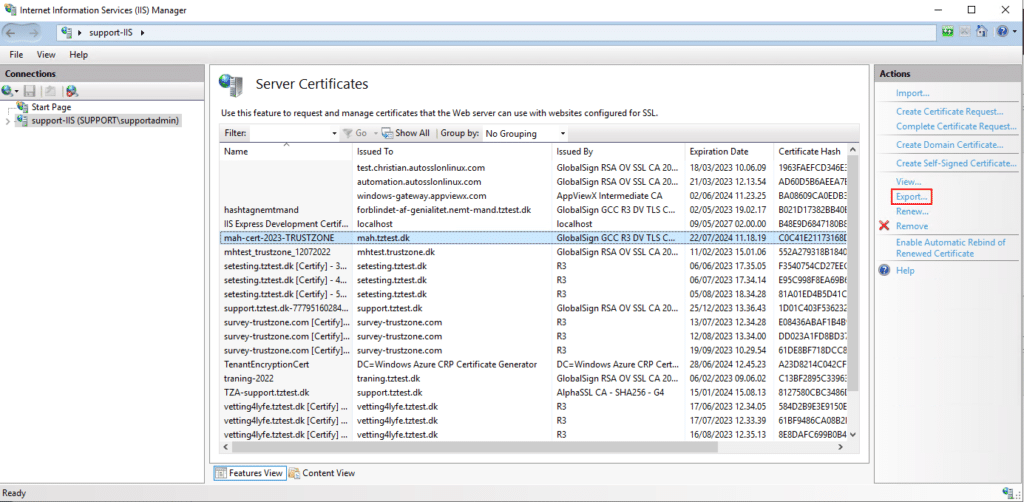
4. On the Server Certificates page (center pane), select the desired certificate.
5. In the Actions menu (right pane), click the “Export…” button:

6. On the File Name page, under Specify a file name for the pfx, click the … box to browse to a location where you want to save your .pfx.
7. Now, enter a password and confirm it.
8. Click “OK,” and the .pfx file will be created and located at the selected file path.
Submit Your Technical Queries Here for Expert Assistance!
We will contact you as soon as possible.
Please enter your details below.

