Share Article
How to Sign Documents with AATL Certificates (Adobe)
How to Sign Documents with AATL Certificates (Adobe)
How to Sign Documents with AATL Certificates (Adobe)
1. Open the PDF you wish to sign in Adobe Reader
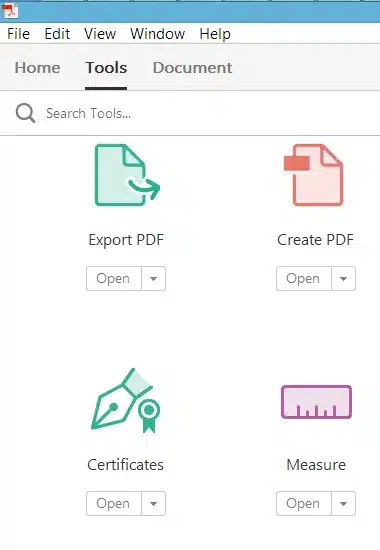
2. Click the Tools button towards the top left, then click Certificates
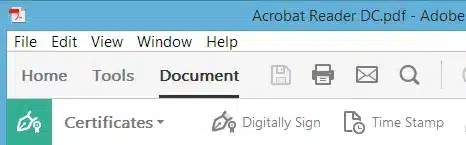
3. Next, click the Digitally Sign button:
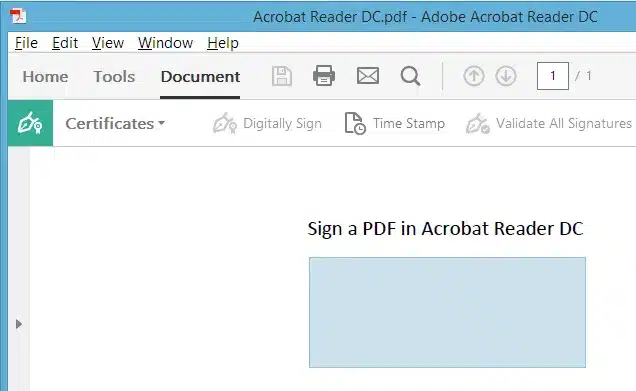
4. Click OK to drag a signature rectangle:

5. Drag a signature rectangle where you would like your signature to appear:
6. When you release the signature rectangle, a window will appear with signing options. Choose your signing certificate from the drop-down menu. You may optionally customize the appearance of your signature. Click Sign:

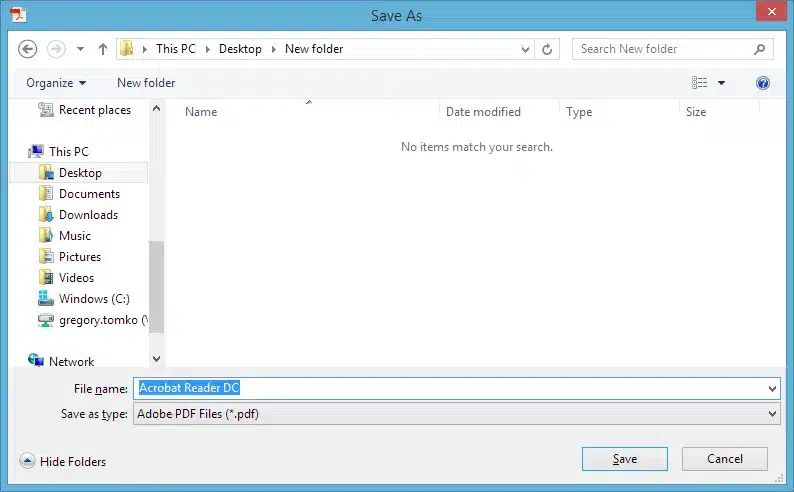
7. You will be prompted to re-save your document. You may either replace the existing file or save it under a new name. Click Save:
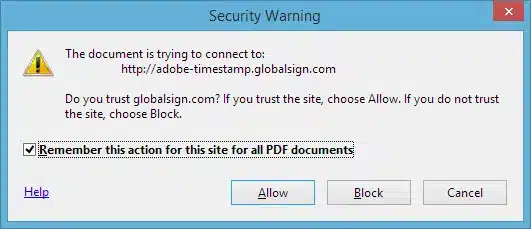
8. If this is your first time signing, you may be prompted to allow Reader to access a timestamp. If you get this prompt, click Allow. The 3rd party timestamp enables non-repudiation of your signature, it acts much like a digital notary:
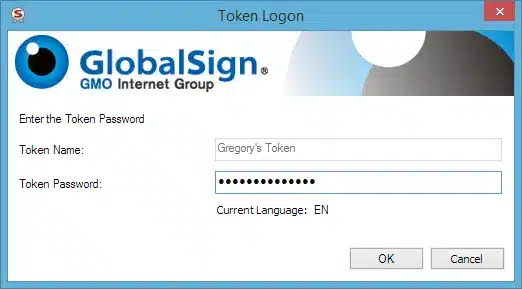
9. Next, enter the password for your AATL or CDS certificate:
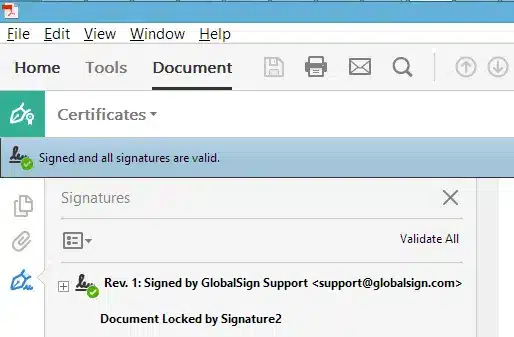
10. Once the signature is placed you will see your signature on the document and the “Blue Bar” will be activated showing that your signature is valid:

Jon Tittmann
Vetting/Support Team Lead & OpEx
Jon has been an integral part of TRUSTZONE for the past six years, during which he has acquired substantial expertise in the cyber security field. As the team leader for our support team, he possesses a profound understanding of the sector, enabling him to resolve even the most complex challenges within the certificate industry effectively.
